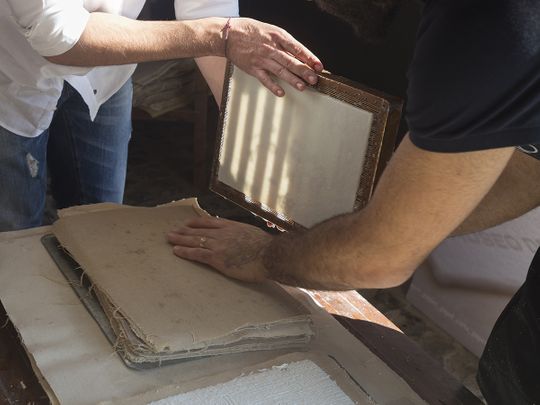
Every day we use paper in more ways than we realise – along the way collecting hundreds of receipts and bills from morning coffees, packaging, paper bags and actual printed paper that we don’t need anymore. Not to mention newspapers and beloved magazines. What if we could turn all that into beautiful new paper on our own, that can then be used for cards, daily writing and even be planted after use to give rise to fresh, blooming buds?
You can make dual coloured paper with any colour of your choice, add dried, fine sprigs of your favourite creeper, and even paper sprinkles – the possibilities are endless, and handmade custom paper and items can make for lovely gifts as well.
Here’s a guide to how you can do it at home, filmed at Dubai Design Week 2021:
What you will need:
- Waste paper (newspapers, used paper, bills, packaging)
- Blender
- Mould
- Deckle (frame)
- Sponge
- For coloured paper – turmeric can be used for yellow, coffee for brown, and acrylic paints for other colours
- Two big plastic tubs to soak the pulp
- A tub for each colour that you are planning to use
- Dried creepers, fresh flower petals, seeds (optional)
Method
- Fill up a tub with water, roughly tear up the paper into fairly small pieces, and soak in water for 10 minutes.
- Add the soaked paper and water to fill the blender, and blend until the pieces are fine. Take care to stop before the pieces are too fine as it could then pass through the mould for the paper.
- Pour the blended pulp into another large tub and ensure it is well submerged in water. Repeat this step until all the pulp is blended.
- Here, if you would like to make various coloured paper, separate the pulp into different tubs, and add your natural dyes (turmeric, coffee) or acrylic colours to each pulp mixture.
- Let it sit for at least 20 minutes, but you can use the pulp mixture after days as well.
- Place a large paper or thin cotton cloth next to the tub before making the paper (It is just required to be bigger than your mould and deckle size). Before making the paper, stir the pulp with your hands so that it is evenly distributed.
- For thin paper – place the mould on the deckle firmly and dip only a little below the surface of the water, collecting the pulp on the mesh and then bring out of the water, shaking to and fro to distribute the paper pulp evenly on the mesh.
- For thicker paper, dip the mould and deckle deeper into the pulp mixture.
- Making dual coloured paper: To make paper of two colours, lower the deckle and mould on only one end into the first colour and gently shake back and forth to distribute the coloured pulp mesh within half of the mould and deckle’s length. Repeat this on the other side with the second colour, and blend as desired by shaking gently as before.
- Remove the mould and move the deckle out of the tub entirely. Here, if you are looking to add small sprigs of a creeper, seeds or sprinkles, put it on top of the pulp.Make sure that any seeds or creepers used are fine and thin, so as not to disturb the structure of the paper.
- Carefully, overturn and press the deckle down on the paper or cotton.
- Keep pressing down to flatten the pulp between the deckle’s mesh, and paper or cotton, and as the water rises from behind the mesh, use a sponge to soak up the water, and squeeze it back into the tub with the pulp mixture.
- Repeat this step until most of the water has been pressed out, and remove the deckle.
- Your layer of paper will be fully formed on the clothes, and then just hang it to dry.
- After around a day, it will be ready to peel off, and you have your paper ready! You can make cards, bookmarks, small notebooks and even paint and decorate it further.


